Application Integration Samples
- Application Integration Samples
Integrate Hyper SDK to a website
Hyper SDK can be integrated to any website so that users can interact with HyperIntelligence cards. To integrate Hyper SDK to a website, follow the instructions below.
1. Load Hyper SDK on your web pages
<script type="text/javascript"
src="{YOUR_LIBRARY_SERVER_BASE_URI}/static/hyper/sdk/js/mstr_hyper.bundle.js">
</script>
Please replace
{YOUR_LIBRARY_SERVER_BASE_URI}with your MCI Library Server instance url. e.g. https://mci-xxx.hypernow.microstrategy.com/MicroStrategyLibraryRegarding how to create a HyperIntelligence Service instance, please refer to HyperIntelligence.
Once you have the URL to the Library Server, you can get the URL to the Hyper SDK main JavaScript bundle by appending
/static/hyper/sdk/js/mstr_hyper.bundle.jsto the end. E.g. if your Library Server URL ishttps://mci-xxx.hypernow.microstrategy.com/MicroStrategyLibrary, the URL to the main JavaScript bundle ishttps://mci-xxx.hypernow.microstrategy.com/MicroStrategyLibrary/static/hyper/sdk/js/mstr_hyper.bundle.js
2. Initialize the Hyper SDK
Hyper SDK needs to connect to a Strategy Library Server to work. After Hyper SDK is loaded to your web page, initialize Hyper SDK by calling mstrHyper.start function like below:
<script>
  window.addEventListener('load', function () {
    mstrHyper
      .start({
        server: '{YOUR_LIBRARY_SERVER_BASE_URI}',
        auth: {
          authMode: mstrHyper.AUTH_MODES.GUEST
        }
      })
      .then(function () {
        console.log('Strategy HyperIntelligence is initialized.');
      })
      .catch(function (error) {
        console.error(error);
      });
  });
</script>
Working together with Strategy Embedding SDK
A typical use case of Hyper SDK is to work together with Embedding SDK, here’s an example:
<!DOCTYPE html>
<html>
<head>
  <title>Hyper SDK Demo</title>
</head>
<body>
    <div id="dossierContainer"></div>
    <script>
      var SERVER_URL = '{YOUR_LIBRARY_SERVER_BASE_URI}';
      var projectId = 'B7CA92F04B9FAE8D941C3E9B7E0CD754';
      var dossierId = '9940B88041375A4E0407B6819B317601';

      function showDossier(authToken) {
        var placeHolderDiv = document.getElementById('dossierContainer');
        var dossierUrl = SERVER_URL +'/app/'+ projectId + '/' + dossierId;
        return microstrategy.dossier.create({
          placeholder: placeHolderDiv,
          url: dossierUrl,
          enableCustomAuthentication: true,
          enableResponsive: true,
          customAuthenticationType: microstrategy.dossier.CustomAuthenticationType.AUTH_TOKEN,
          getLoginToken: async () => authToken, // getLoginToken should return a promise
          navigationBar: {
            enabled: true
          },
        });
      }

      async function startAll(){
        await mstrHyper.init({ server: SERVER_URL });
        var authToken = await mstrHyper.login({
          authMode: mstrHyper.AUTH_MODES.GUEST,
        });

        await showDossier(authToken);
        await mstrHyper.enableCards([
          {
            "id":"30BE6FA64751626261539CA7E0BE1CB1",
            projectId
          }]);
      }

      window.onload = () => startAll();
    </script>
    <script type="text/javascript" src="{YOUR_LIBRARY_SERVER_BASE_URI}/static/hyper/sdk/js/mstr_hyper.bundle.js"></script>
    <script type="text/javascript" src="{YOUR_LIBRARY_SERVER_BASE_URI}/javascript/embeddinglib.js"></script>
</body>
</html>
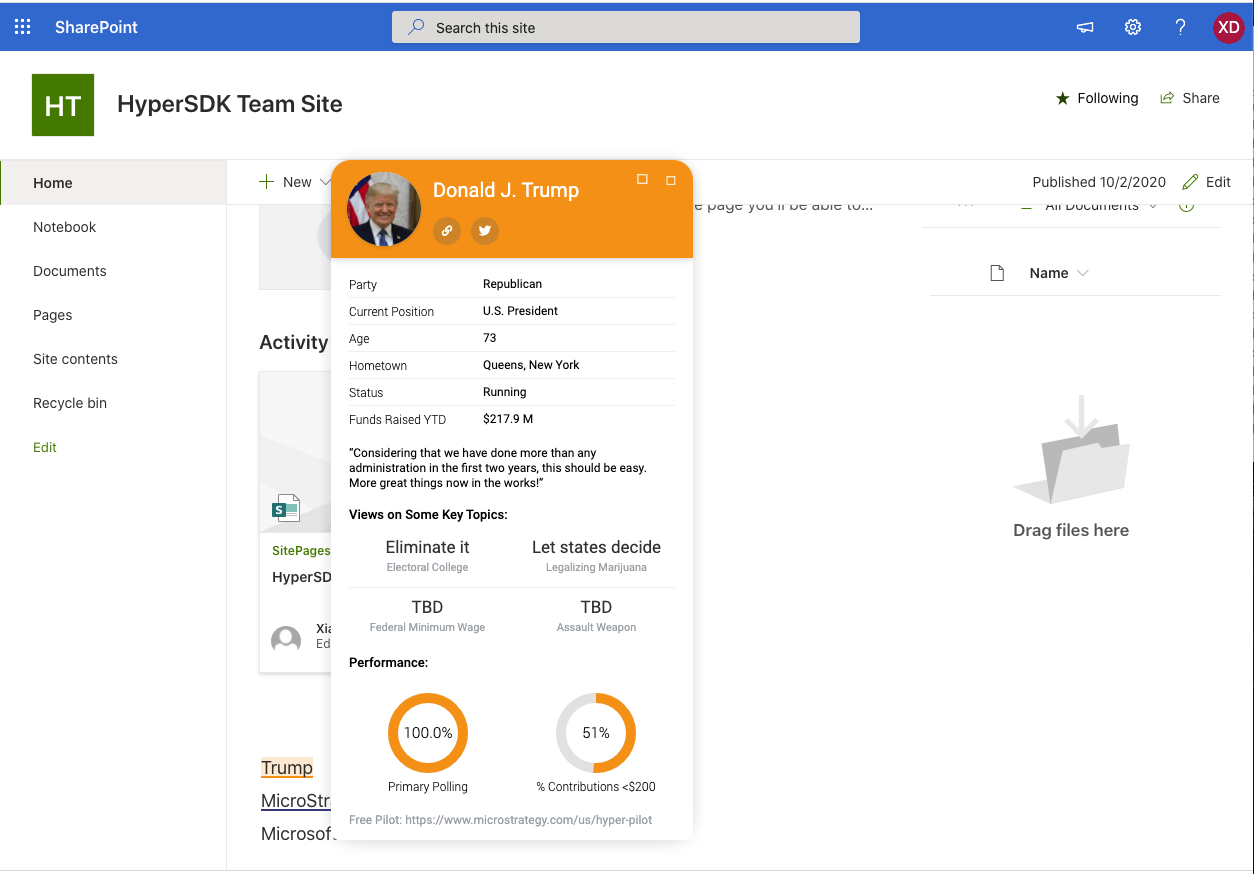
Integrate Hyper SDK to Sharepoint pages
Microsoft SharePoint allows users to create websites with the use of multiple templates and SharePoint web parts, which incredibly expand the basic functionality.
For more details please refer to SharePoint Documentation. For code examples please refer to SharePoint Framework Client-Side Web Part Samples & Tutorial Materials
SharePoint Online Web Parts
To integrate with Hyper SDK on your SharePoint sites, you can build Web Parts to support it.
Classic Sites
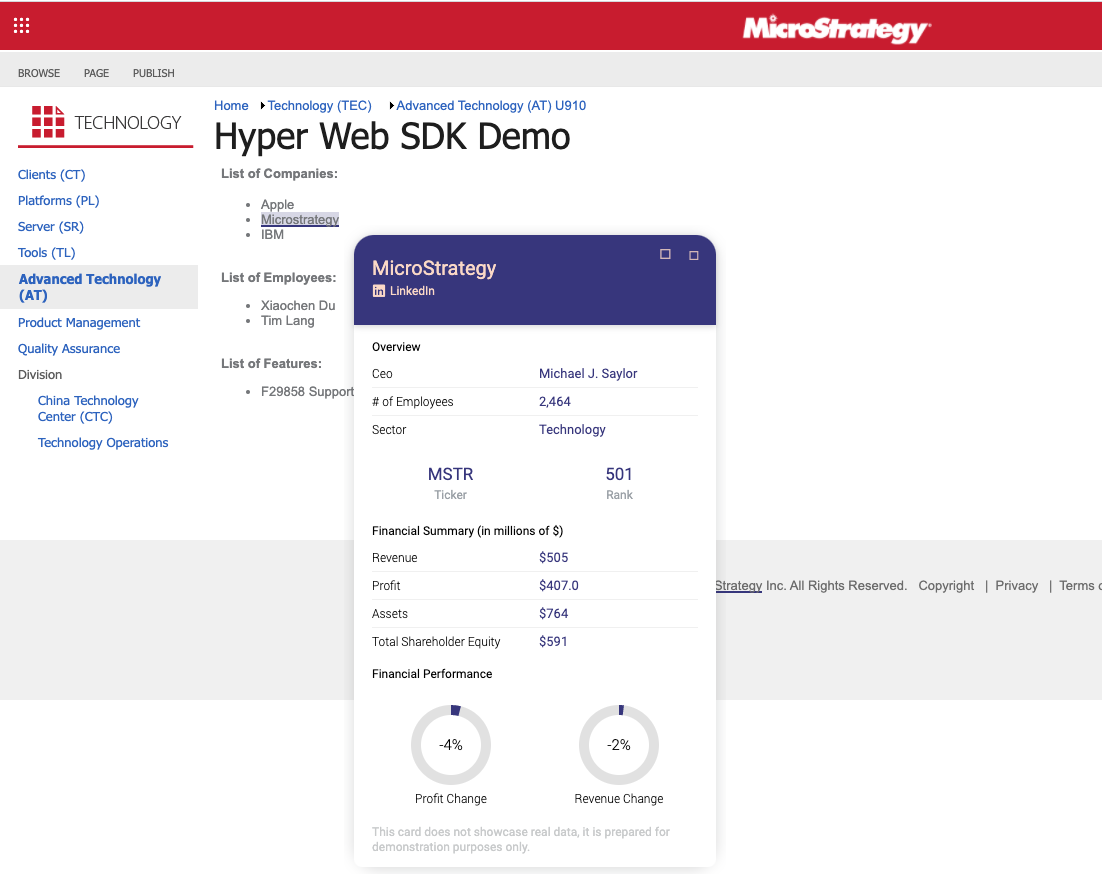
You can use HyperSDK on SharePoint classic sites, using the out-of-the-box Script Editor web part.
If you don’t see this option, please ask your admin to enable it.
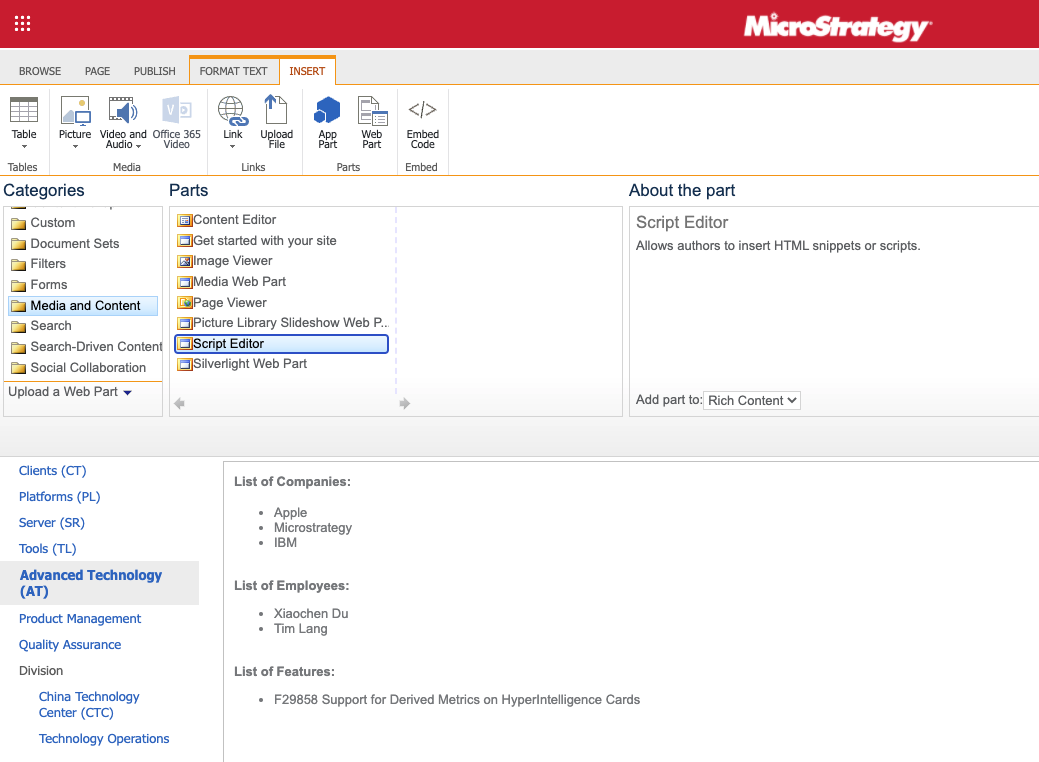
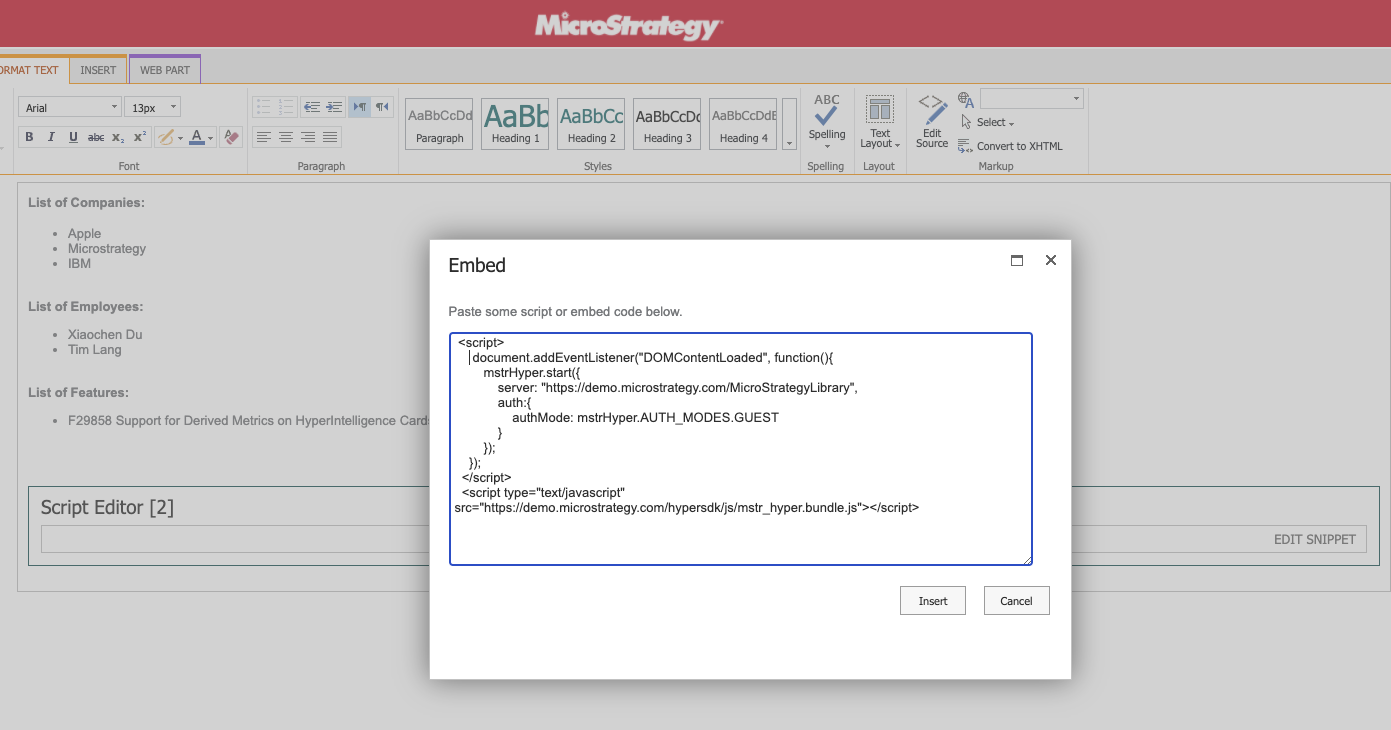
Edit the Snippet of the web part, and add the follow code there.
<script>
  const initHyperSDK = function() {
    mstrHyper.start({
      server: '{YOUR_LIBRARY_SERVER_BASE_URI}',
      auth: {
        authMode: mstrHyper.AUTH_MODES.GUEST
      }
    });
  }
  if(document.readyState === 'complete') {
    initHyperSDK();
  } else {
    window.addEventListener('load', initHyperSDK);
  }
</script>
<script
  type="text/javascript"
  src="{YOUR_LIBRARY_SERVER_BASE_URI}/static/hyper/sdk/js/mstr_hyper.bundle.js">
</script>
Modern Sites
On a modern site you cannot edit code snippet in editor directly. Instead, you will be creating a Web Part bundle and upload to use it.
Microsoft SharePoint allows users to create websites with the use of multiple templates and SharePoint web parts, which incredibly expands the basic functionality.
For more details please refer to SharePoint Documentation.
For code examples please refer to SharePoint Framework Client-Side Web Part Samples & Tutorial Materials
You can make your own web parts using Hyper SDK.
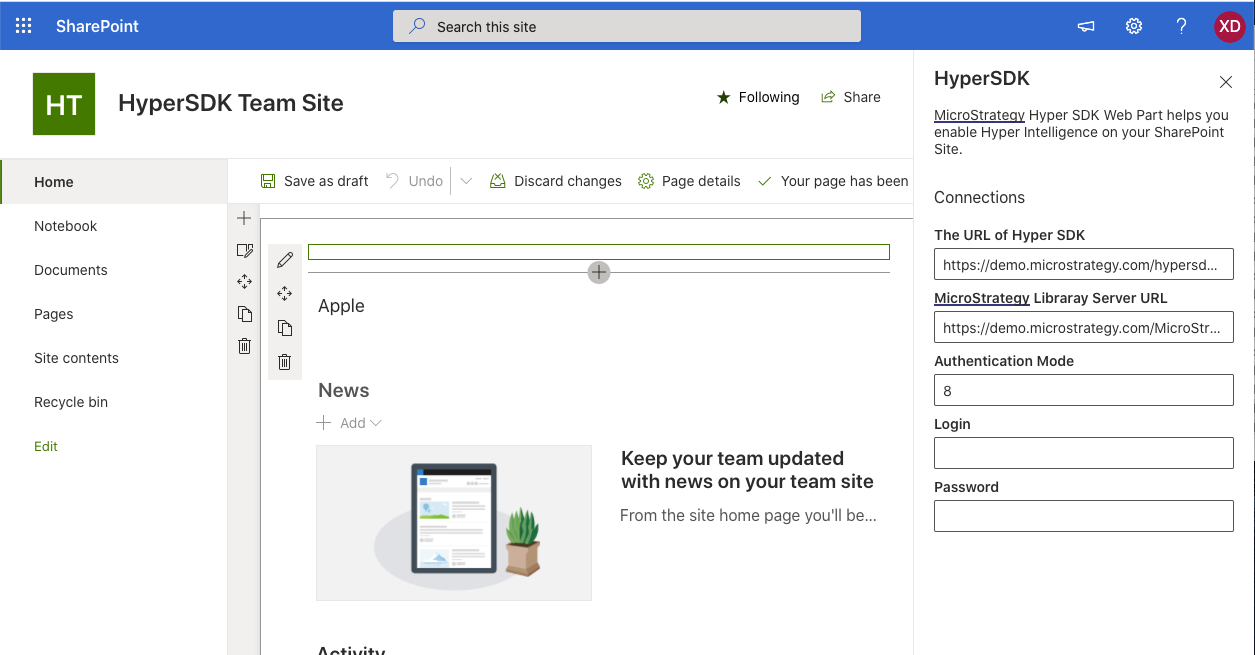
Please refer to Build & deploy your first web part for how to create web part.
Here’s an example you can follow to customize the configuration of HyperSDK: webpart.ts
Integrate Hyper SDK to Salesforce pages
Salesforce provides a framework called Visualforce. User can use visualforce makeup language to create custom pages using html and javascript as well as salesforce’s custom tags which can be hosted natively on the Lightning platform.
How to use HyperSDK in Salesforce Visualforce page
Salesforce has a framework called Visualforce. User can use Visualforce makeup language to create custom pages using HTML and JavaScript as well as Salesforce’s custom tags.
More info on Visualforce.
Here is the code you can used to create Visualforce component.
<script
  type="text/javascript"
  src="{YOUR_LIBRARY_SERVER_BASE_URI}/static/hyper/sdk/js/mstr_hyper.bundle.js">
</script>
<script>
  const initHyperSDK = function() {
    mstrHyper.start({
      server: '{YOUR_LIBRARY_SERVER_BASE_URI}',
      mstrHyper.AUTH_MODES.GUEST,
    });
  }
  if(document.readyState === 'complete') {
    initHyperSDK();
  } else {
    window.addEventListener('load', initHyperSDK);
  }
</script>
Then, you can use the component on Visualforce Page.
<apex:page >
    <c:hypersdk ></c:hypersdk>
    <apex:include pageName="UC"/>
    <apex:pageMessages />
</apex:page>
Visualforce has over 150 standard components. You can build custom component and custom pages. It works with all standard web tech (CSS, JavaScript, HTML).
Check out Visualforce Developer Guide from Salesforce.
Other ways to use HyperSDK
Please refer to Salesforce Experience Builder and Salesforce Community.
Integrate Hyper SDK to Strategy Web via a plugin
Some Strategy Web customizations require the use of JavaScript to be included on a Strategy Web page. The plug-in architecture provided by Strategy Web can be used to achieve this purpose.
Read more about Adding Custom JavaScript
Here we provide 2 sample plugins you can use in Strategy Web.
If you want to customize your authentication by yourself, please refer to Sample MSTR Web Plugin.
If you want to have a seamless login experience, let Hyper SDK reuse Strategy Web’s session, please refer to Sample MSTR Web Seamless Plugin.
How to deploy the Hyper SDK plugin on Strategy Web?
- Connect to the application server where Strategy Web is installed
- Navigate to the path for Strategy Web
- Download and unzip the Sample MSTR Web Plugin
- Copy and paste the “Hyper-SDK” folder in the “Plugins” folder under “MicroStrategy”
- Open and edit the “global.js” in “javascript” under the “Hyper-SDK” folder just pasted
- You should change
libraryServerUrl: 'YOUR LIBRARY SERVER URL'to the real Library Server Url in your environment. Based on your authentication, you may need to changeauthMode: mstrHyper.AUTH_MODES.GUESTas well, see here for more details
(function (config) { const PATH_TO_HYPER_JS = `/static/hyper/sdk/js/mstr_hyper.bundle.js?v=${new Date().getTime()}`; const joinUrl = (baseUrl, apiUrl) => `${baseUrl.replace(/\/+$/g, '')}/${apiUrl.replace(/^\/+/g, '')}`; const initPlugin = () => { const script = document.createElement('script'); script.src = joinUrl(config.libraryServerUrl, PATH_TO_HYPER_JS); document.body.appendChild(script); script.onload = () => { mstrHyper.start({ server: config.libraryServerUrl, auth: { authMode: mstrHyper.AUTH_MODES.GUEST } }); }; }; if (document.readyState === 'complete') { initPlugin(); } else { window.addEventListener('load', initPlugin); } })({ libraryServerUrl: 'YOUR LIBRARY SERVER URL' }); - You should change
- Restart the application server
How to deploy the Seamless Hyper SDK plugin on Strategy Web?
- Connect to the application server where Strategy Web is installed
- Navigate to the path for Strategy Web
- Download and unzip the Sample MSTR Web Seamless Plugin
- Copy and paste the “Hyper-SDK” folder in the “Plugins” folder under “MicroStrategy”.
- Open and edit the “global.js” in “javascript” under the “Hyper-SDK” folder just pasted.
- You should change
libraryServerUrl: 'YOUR LIBRARY SERVER URL'to the real Library Server Url in your environment,mstrWebUrl: 'YOU MSTR WEB URL'to the real Strategy Web Url in you environment
(function (mstrConfig, config) { const { libraryServerUrl, mstrWebUrl } = config; const joinUrl = (baseUrl, apiUrl) => `${baseUrl.replace(/\/+$/, '')}/${apiUrl.replace(/^\/+/, '')}`; const isInBlackListPage = () => { const blackList = ['welcome', 'login', 'welcomeadmin']; if (window.microstrategy) { return blackList.includes(window.microstrategy.pageName); } return false; }; const makeRequest = (url, config) => fetch(url, { mode: 'cors', credentials: 'include', ...config }); const getCurrentLibraryToken = () => makeRequest(joinUrl(libraryServerUrl, '/api/auth/token'), { method: 'GET', headers: { Accept: '*/*' } }).then((response) => { if (response.status === 204) { return response.headers.get('x-mstr-authtoken'); } throw new Error(`HTTP ${response.status}: no library session.`); }); const createIdentityToken = () => { const taskUrl = (mstrConfig || {}).taskURL || 'taskProc'; const api = joinUrl( mstrWebUrl, `/servlet/${taskUrl}?taskId=createIdentityToken&taskContentType=json&taskEnv=xhr` ); return makeRequest(api, { method: 'POST' }).then((response) => { if (response.status === 200) { return response.json().then((e) => e.identityToken); } throw new Error( `HTTP ${response.status}: failed to create web identity token.` ); }); }; const getLibraryTokenByIdentityToken = (identityToken) => makeRequest(joinUrl(libraryServerUrl, '/api/auth/delegate'), { method: 'POST', headers: { Accept: '*/*', 'Content-Type': 'application/json' }, body: JSON.stringify({ loginMode: -1, identityToken: identityToken }) }).then((response) => { if (response.status === 204) { return response.headers.get('x-mstr-authtoken'); } throw new Error( `HTTP ${response.status}: failed to get library token by identity token.` ); }); const webSeamlessLogin = () => createIdentityToken().then(getLibraryTokenByIdentityToken); const loadHyperSdk = () => { const script = document.createElement('script'); script.src = joinUrl( libraryServerUrl, `/static/hyper/sdk/js/mstr_hyper.bundle.js?v=${new Date().getTime()}` ); document.body.appendChild(script); return script; }; const startHyperSdk = (libraryToken) => { let webAuthMode; if (mstrConfig) { webAuthMode = parseInt(mstrConfig.authMode, 10); } else { webAuthMode = mstrHyper.AUTH_MODES.STANDARD; console.warn( 'mstrConfig is not available, assuming standard authentication mode.' ); } mstrHyper .start({ server: libraryServerUrl, auth: { authMode: webAuthMode, authToken: libraryToken, onSessionError: (error) => { console.error(error.message); return webSeamlessLogin(); } } }) .then((cards) => { console.log('Strategy HyperIntelligence is initialized.'); console.log('Hyper Cards:', cards); }) .catch((error) => console.error('mstrHyper.start error: ', error)); }; const initHyperSdk = (libraryToken) => { const script = loadHyperSdk(); script.onload = () => startHyperSdk(libraryToken); }; const initPlugin = () => { if (isInBlackListPage() || !(mstrConfig || {}).seamlessLoginEnabled) { return; } getCurrentLibraryToken() .catch(webSeamlessLogin) .then(initHyperSdk) .catch((error) => console.error('Initialize Hyper SDK error:', error)); }; if (document.readyState === 'complete') { initPlugin(); } else { window.addEventListener('load', initPlugin); } })(window.mstrConfig, { libraryServerUrl: 'YOUR LIBRARY SERVER URL', mstrWebUrl: 'YOU MSTR WEB URL' }); - You should change
- Restart the application server
Integrate Hyper SDK to Strategy Library Web via a plugin
The way plugin works in Strategy Library Web is the same as Strategy Web.
Read more about Adding Custom JavaScript
Here we provide 2 sample plugins you can use in Strategy Library.
If you want to have highlight show on all dossiers, please refer to Sample MSTR Web Plugin.
If you want to only show highlight on specific dossier(s), please refer to Sample MSTR Web Enable on Specific Dossiers Plugin.
How to deploy the Hyper SDK plugin on Strategy Library Web?
- Connect to the application server where Strategy Library Web is installed
- Navigate to the path for Strategy Library Web
- Download and unzip the Sample MSTR Web Plugin
- Copy and paste the “Hyper-SDK” folder in the “Plugins” folder under “StrategyLibrary”
- Open and edit the “global.js” in “javascript” under the “Hyper-SDK” folder just pasted
- You should change
libraryServerUrl: 'YOUR LIBRARY SERVER URL'to the real Library Server Url in your environment. Based on your authentication mode, you may need to changeauthMode: mstrHyper.AUTH_MODES.GUESTas well, see here for more details
(function (config) { const PATH_TO_HYPER_JS = `/static/hyper/sdk/js/mstr_hyper.bundle.js?v=${new Date().getTime()}`; const joinUrl = (baseUrl, apiUrl) => `${baseUrl.replace(/\/+$/g, '')}/${apiUrl.replace(/^\/+/g, '')}`; const initPlugin = () => { const script = document.createElement('script'); script.src = joinUrl(config.libraryServerUrl, PATH_TO_HYPER_JS); document.body.appendChild(script); script.onload = () => { mstrHyper.start({ server: config.libraryServerUrl, auth: { authMode: mstrHyper.AUTH_MODES.GUEST } }); }; }; if (document.readyState === 'complete') { initPlugin(); } else { window.addEventListener('load', initPlugin); } })({ libraryServerUrl: 'YOUR LIBRARY SERVER URL' }); - You should change
- Restart the application server
How to deploy the Hyper SDK plugin and only enable it on specific dossier(s) Strategy Library Web?
- Connect to the application server where Strategy Library Web is installed
- Navigate to the path for Strategy Library Web
- Download and unzip the Sample MSTR Web Enable on Specific Dossiers Plugin
- Copy and paste the “Hyper-SDK” folder in the “Plugins” folder under “MicroStrategyLibrary”
- Open and edit the “global.js” in “javascript” under the “Hyper-SDK” folder just pasted
- You should change
libraryServerUrl: 'YOUR LIBRARY SERVER URL'to the real Library Server Url in your environment - You should change the the value of
dossierMapdepend on which hyper card you want to enable on which dossier. For example, if your dossier Url ishttps://demo.microstrategy.com/MicroStrategyLibrary/app/EC70648611E7A2F962E90080EFD58751/4E0E1C0D404F105DEBE74399815E00C3, 4E0E1C0D404F105DEBE74399815E00C3 should be the dossier Id. For the hyper card Id, you can read it by opening Workstation, in the Navigation pane, click Cards, find the hyper card you want to enable, right click and choose Get Info to see the hyper card Id - You should change the
ProjectIDto the real project Id in your environment. For example, if you dossier Url ishttps://demo.microstrategy.com/MicroStrategyLibrary/app/EC70648611E7A2F962E90080EFD58751/4E0E1C0D404F105DEBE74399815E00C3, EC70648611E7A2F962E90080EFD58751 should be the project Id of this dossier - Based on your authentication mode, you may need to change
authMode: mstrHyper.AUTH_MODES.GUESTas well, see here for more details
(function (config) { const PATH_TO_HYPER_JS = `/static/hyper/sdk/js/mstr_hyper.bundle.js?v=${new Date().getTime()}`; const joinUrl = (baseUrl, apiUrl) => `${baseUrl.replace(/\/+$/g, '')}/${apiUrl.replace(/^\/+/g, '')}`; //your hyper card's project id const ProjectID = 'PROJECT_ID'; const dossierMap = { //the dossier id you want to show highlight on 'DOSSIER_1_ID': [ { // the hyper card id you want to enable on this certain dossier id: 'HYPER_CARD_1_ID', projectId: ProjectID } ], 'DOSSIER_2_ID': [ { // the hyper card id you want to enable on this certain dossier id: 'HYPER_CARD_2_ID', projectId: ProjectID } ] }; history.pushState = ((f) => function pushState() { var ret = f.apply(this, arguments); window.dispatchEvent(new Event('pushstate')); window.dispatchEvent(new Event('locationchange')); return ret; })(history.pushState); history.replaceState = ((f) => function replaceState() { var ret = f.apply(this, arguments); window.dispatchEvent(new Event('replacestate')); window.dispatchEvent(new Event('locationchange')); return ret; })(history.replaceState); window.addEventListener('popstate', () => { window.dispatchEvent(new Event('locationchange')); }); const initPlugin = () => { const script = document.createElement('script'); script.src = joinUrl(config.libraryServerUrl, PATH_TO_HYPER_JS); document.body.appendChild(script); script.onload = () => { mstrHyper.start({ server: config.libraryServerUrl, auth: { authMode: mstrHyper.AUTH_MODES.GUEST } }); }; let lastUrl = location.href; window.addEventListener('locationchange', function (event) { const url = location.href; if (url !== lastUrl) { lastUrl = url; onUrlChange(url); } }); }; const onUrlChange = (url) => { if (!mstrHyper) return; console.log('URL changed!', location.href); mstrHyper.disableCards(); const asArray = Object.entries(dossierMap); const filtered = asArray.filter(([key, value]) => url.includes(key)); console.log(filtered); if (filtered.length) { const cardIds = filtered[0][1]; mstrHyper.disableCards(); mstrHyper.enableCards(cardIds); } else { mstrHyper.disableCards(); } }; if (document.readyState === 'complete') { console.log('document ready:'); initPlugin(); } else { window.addEventListener('load', initPlugin); } })({ libraryServerUrl: 'YOUR LIBRARY SERVER URL' }); - You should change
- Restart the application server